March 23rd, 2014 § § permalink
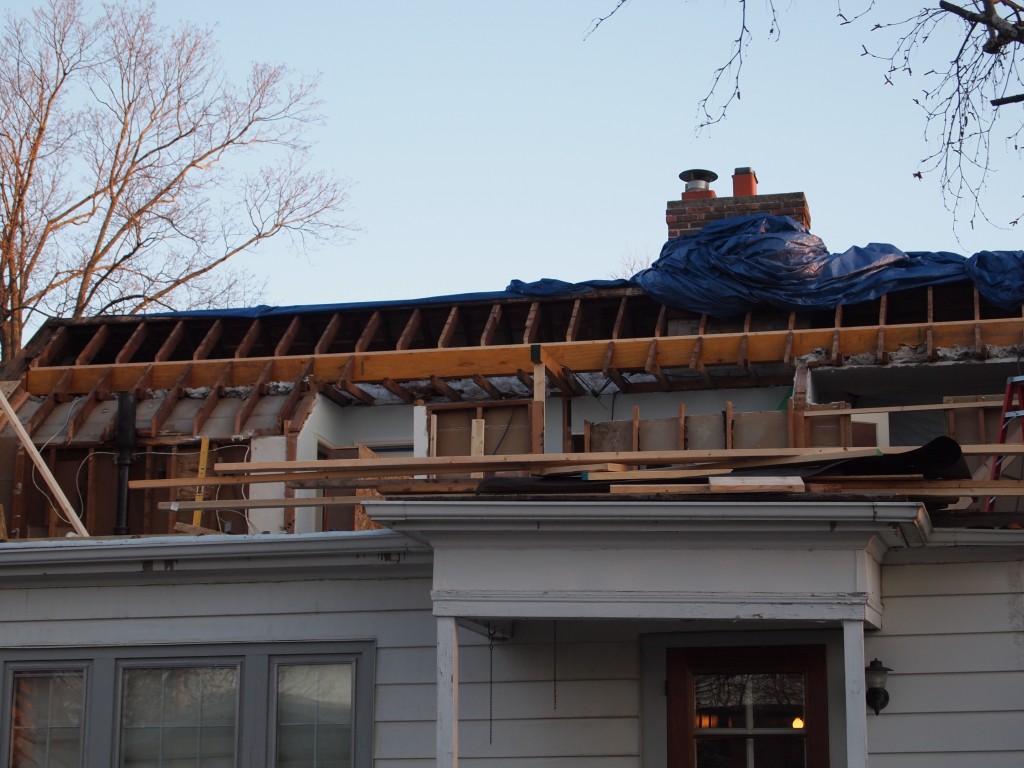
Some very dramatic changes took place this week. The first image is what the house looked on Friday, March 14 at the end of the day. The roof over the back is gone and covered with a tarp for the weekend.
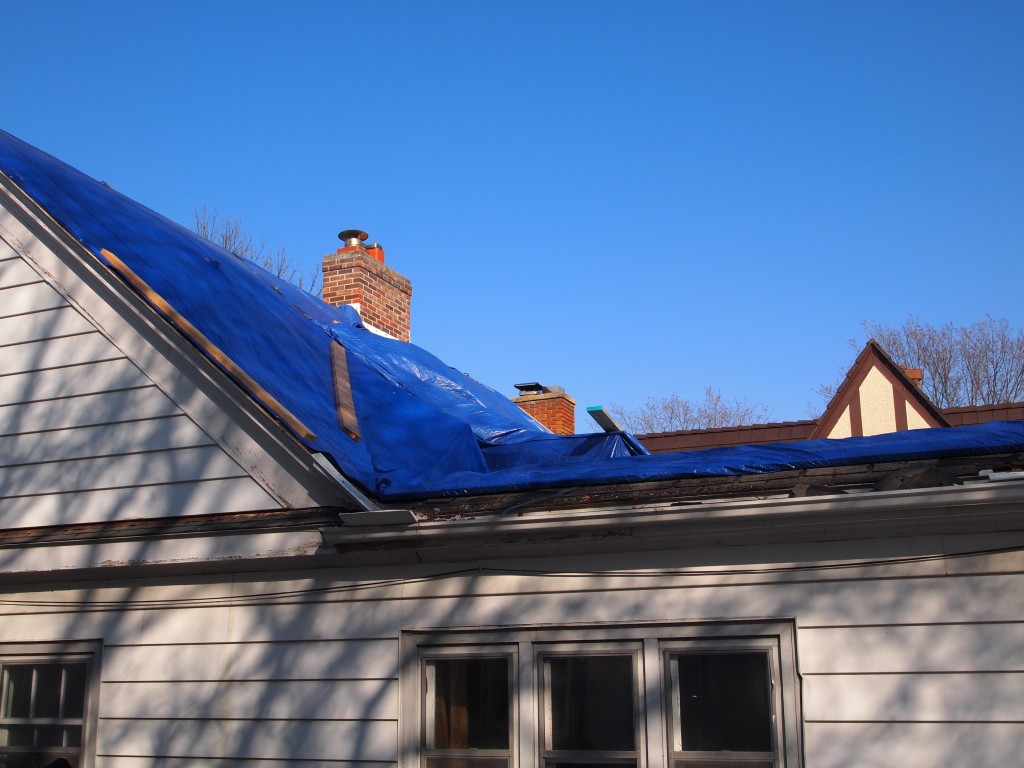
Friday, the 14th, tarps are up for the weekend.
By the end of the day on Monday, the side walls were up and the main beam put in place. Some of the permanent columns were not in place yet, so the beam was braced with temporary supports.
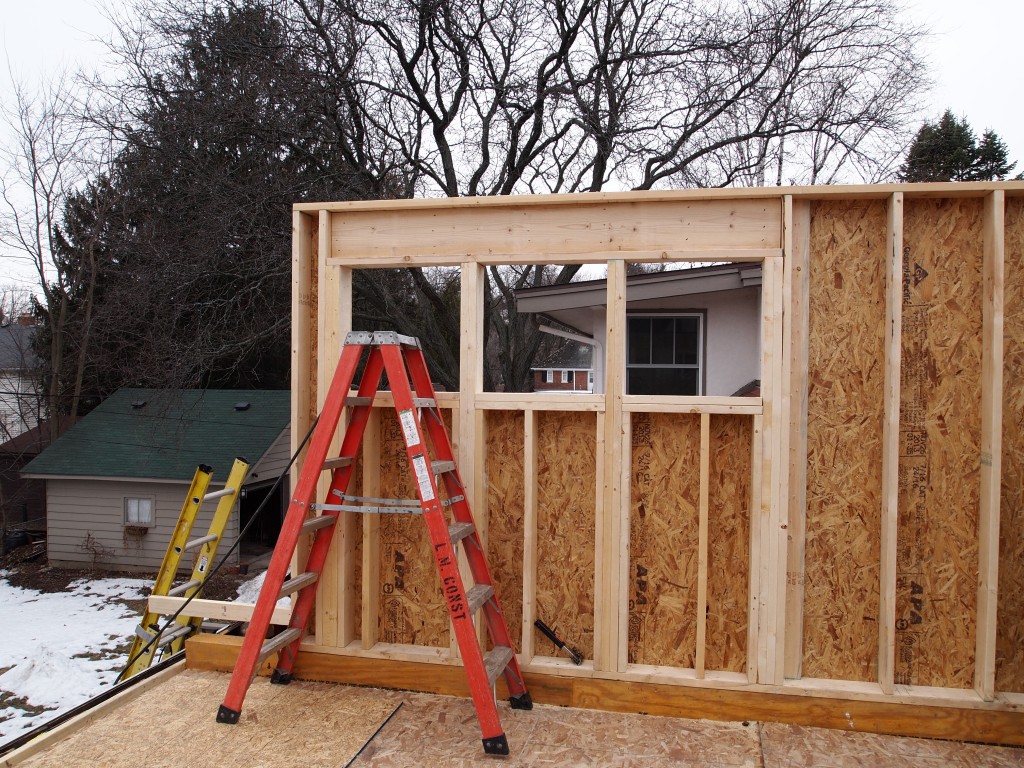
Monday, the 17th, some exterior walls go up.

Main beam in place
On Tuesday the crew spent most of their time on the interior, primarily installing more support columns. We expected the trusses on Tuesday, but they didn’t come.
Wednesday morning, with snow flurries swirling, Greg and Matt unloaded the trusses.

Greg and Matt unloading the trusses
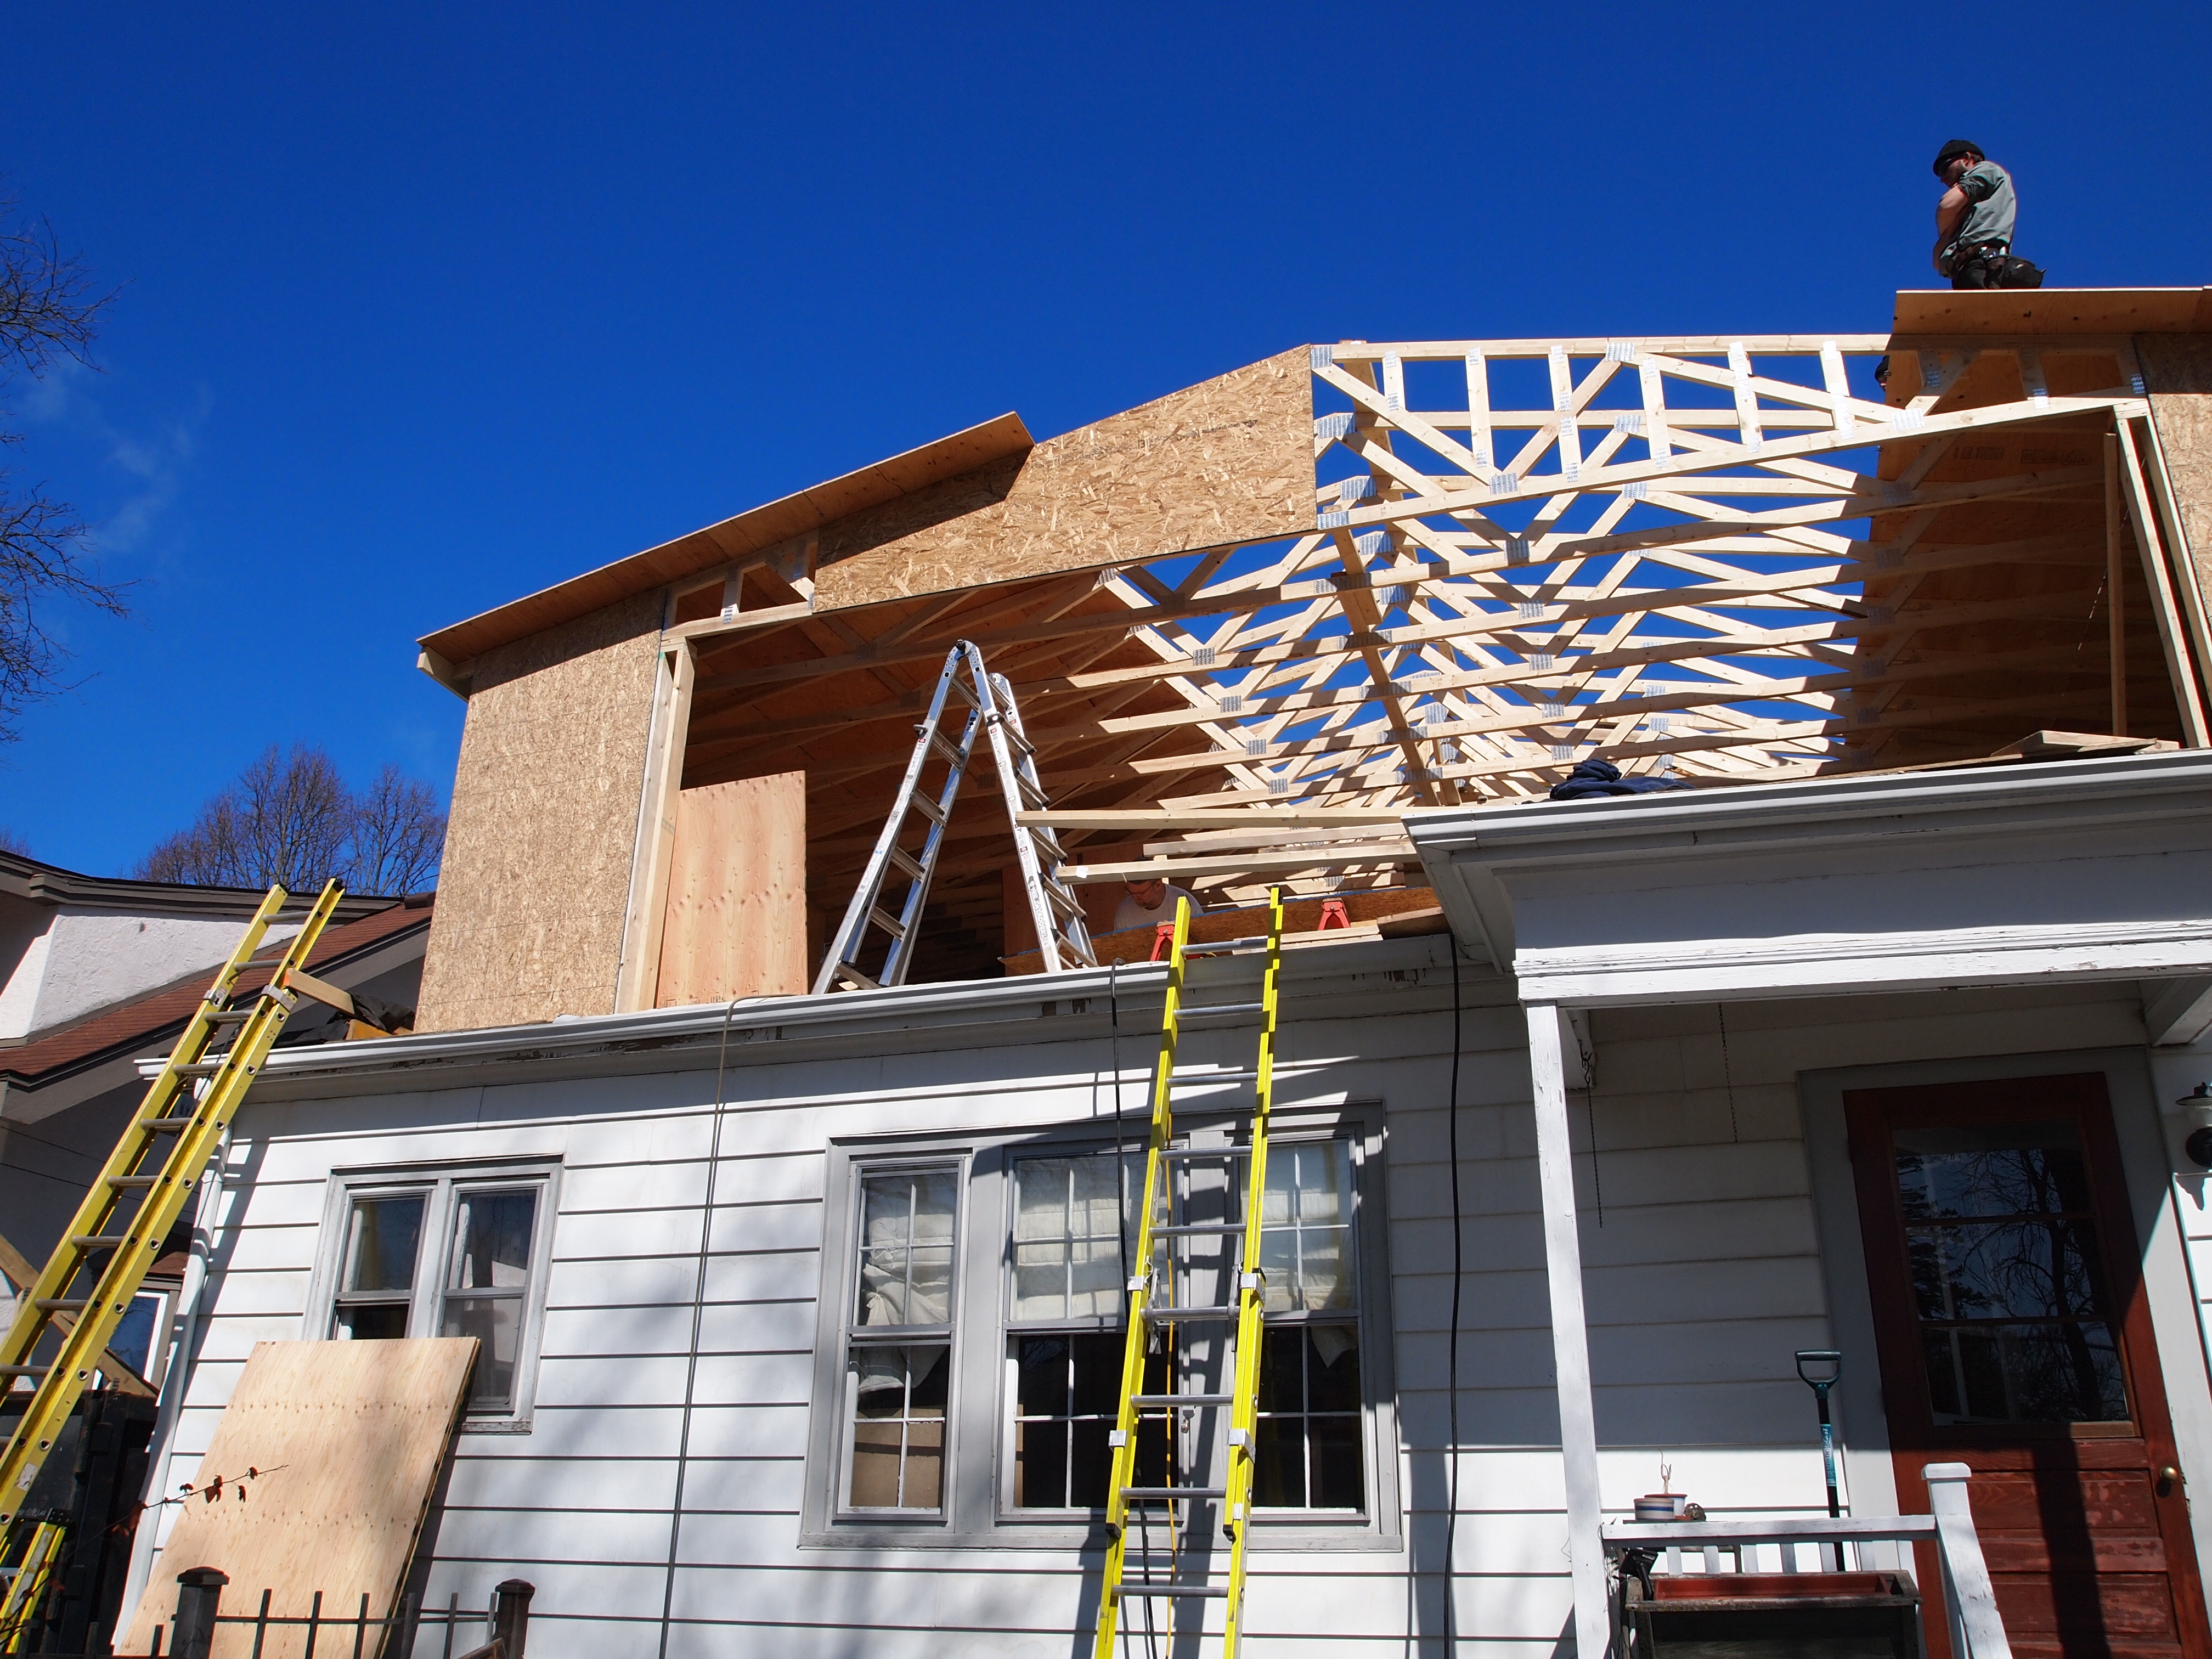
By Thursday morning all hands were ready to install the trusses. The images below show the progress throughout the day.
Thursday morning at 7:20 am, ready to install the trusses
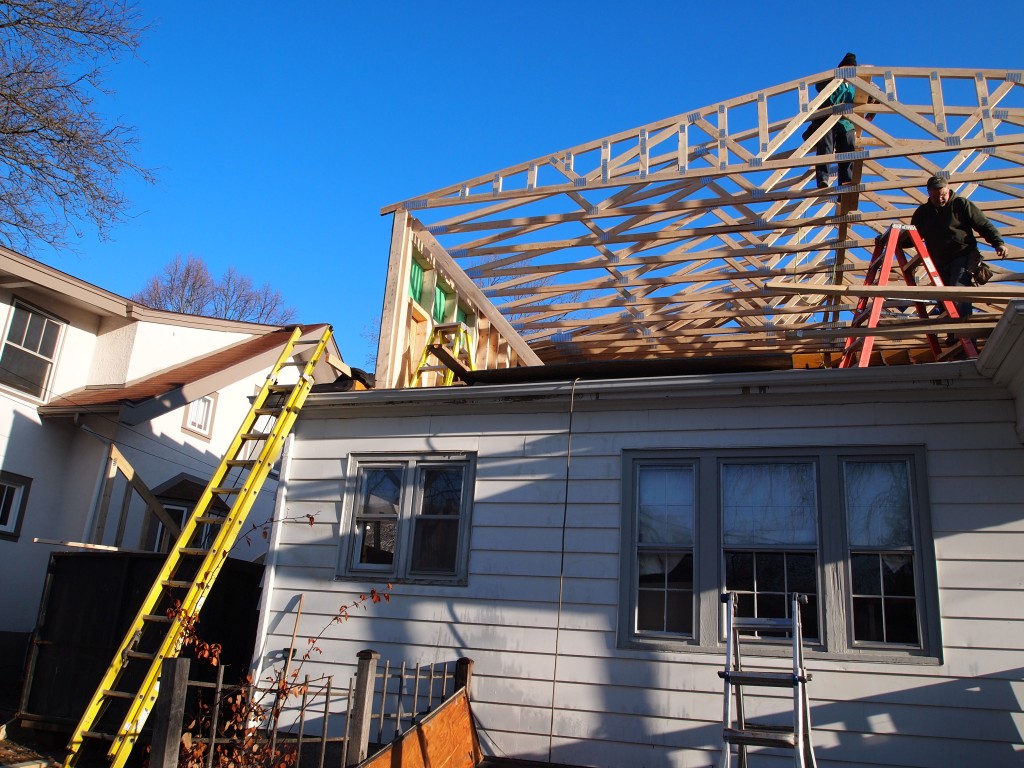
All structural trusses are up by 8:15
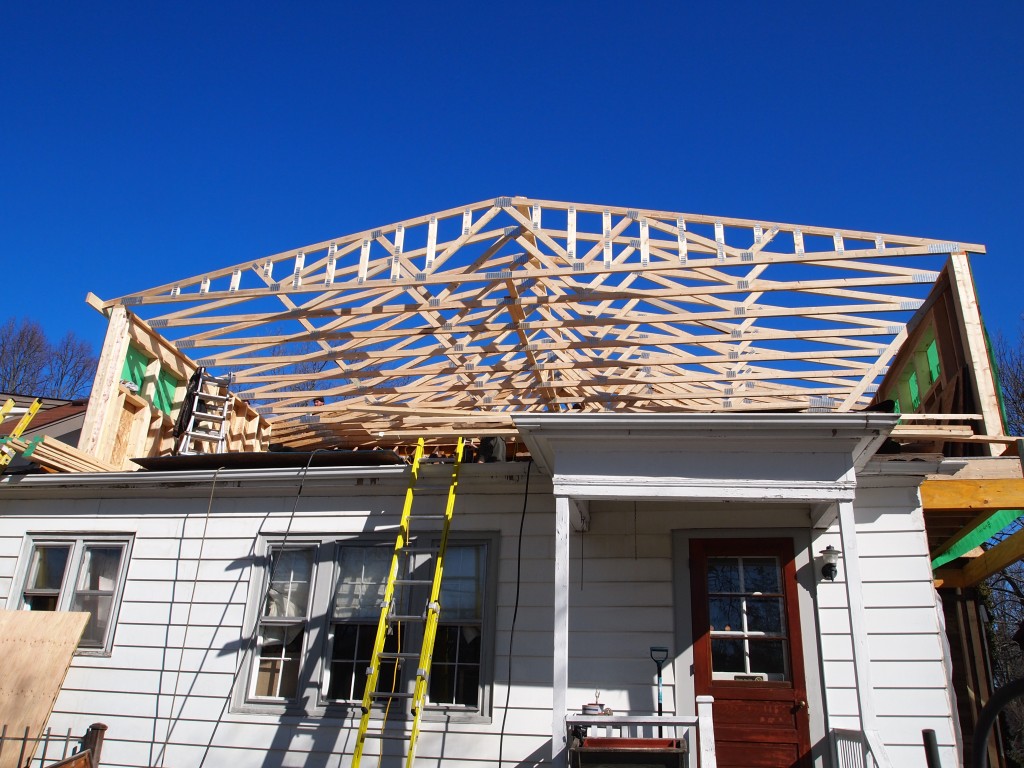
Structural trusses secured by 10:15 am

Roof and sidewall sheathing going on just before noon.
Installing the gable truss at 1:15

Ice and water shield on by 4:40 pm. The end of a busy day.
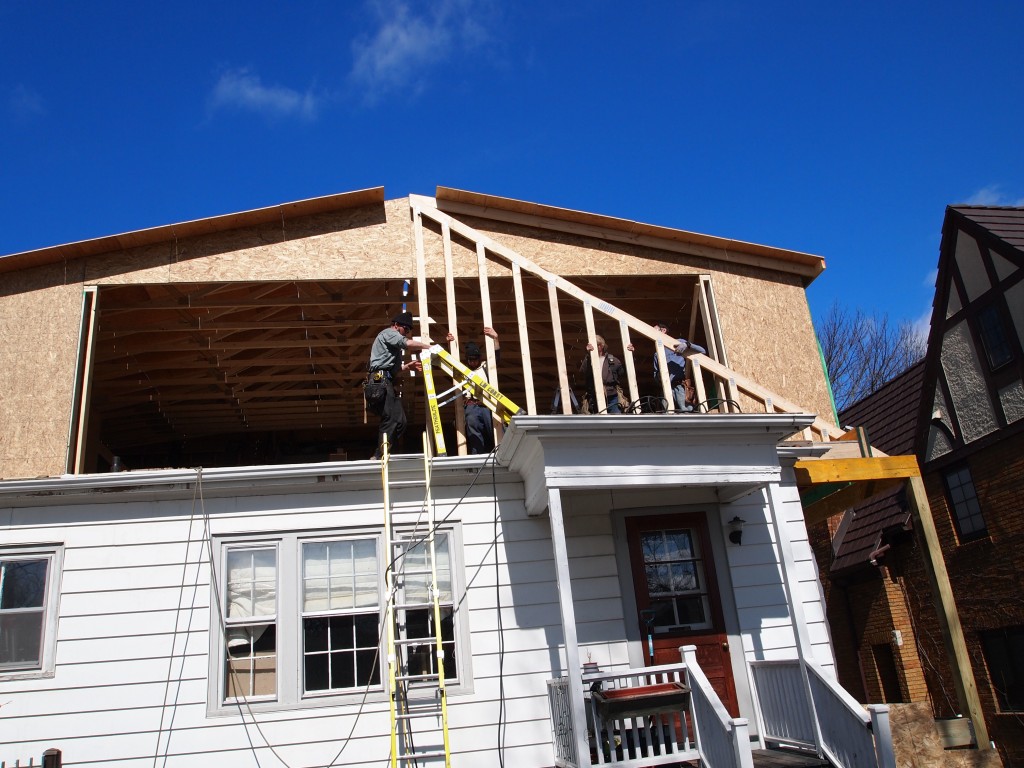
Friday morning was going to be a short day—just a bit of work to prepare the interior for next week and get the rest of the roof ready for the remaining ice and water shield. Right before 9 am I went out to see what the crew was up to and I saw that they were taking down the back porch. I shouted “Stop!” because Rick and I had decided to keep at least the porch roof and install new posts and railings to the deck that would connect to the side deck. As I looked closely I saw that they had already sliced the roof of the porch from the house. The plans didn’t show a porch roof, they said. They waited for Rick to show up before proceeding.
The upshot is that the plans were drawn primarily to obtain the permit from the city. Several details that the draftsman either included or omitted were to be decided during construction since they had no bearing on the permit. This was a pretty big miscommunication, especially since up to now, this had been a very successful week.
As the morning wore on I showed Rick a photo of the kind of porch roof that might work and, in my view, would even look better. Rick said it would also be easier to build than the old porch. By lunchtime the new porch roof was framed in as you can see in the photo below.
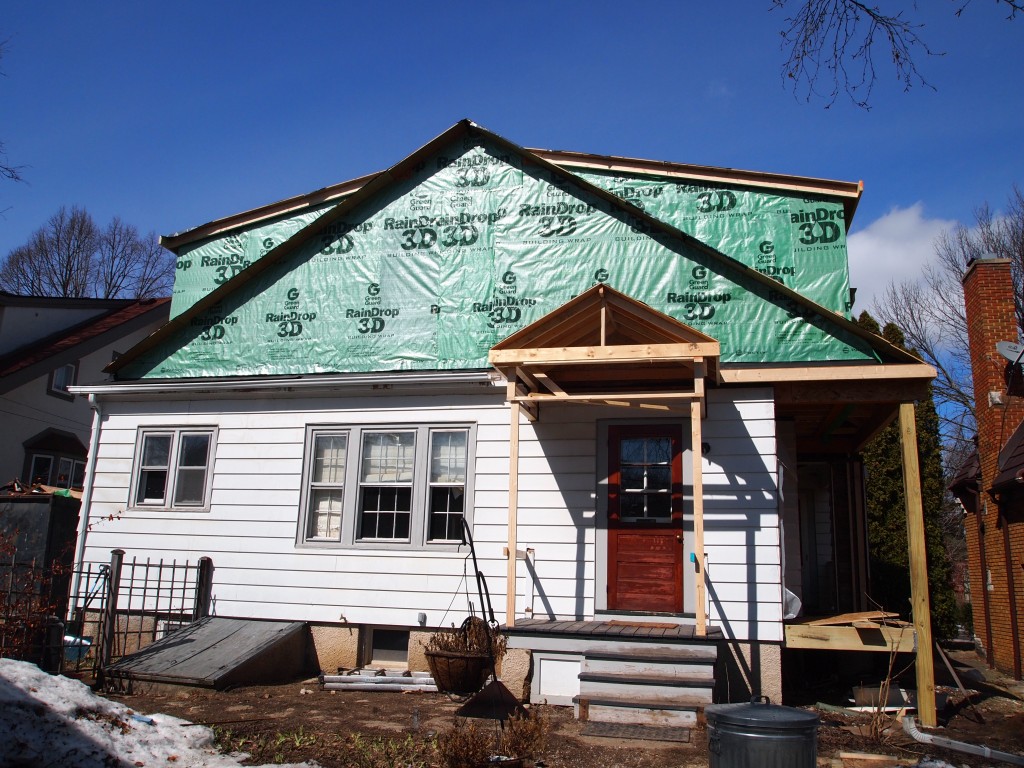
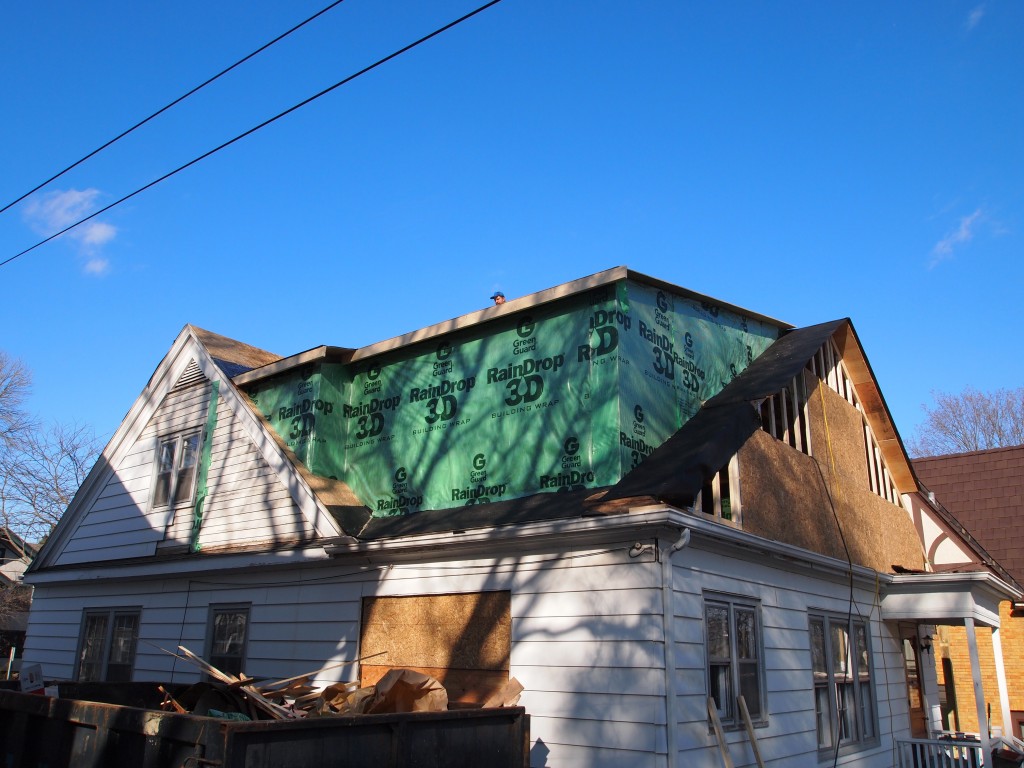
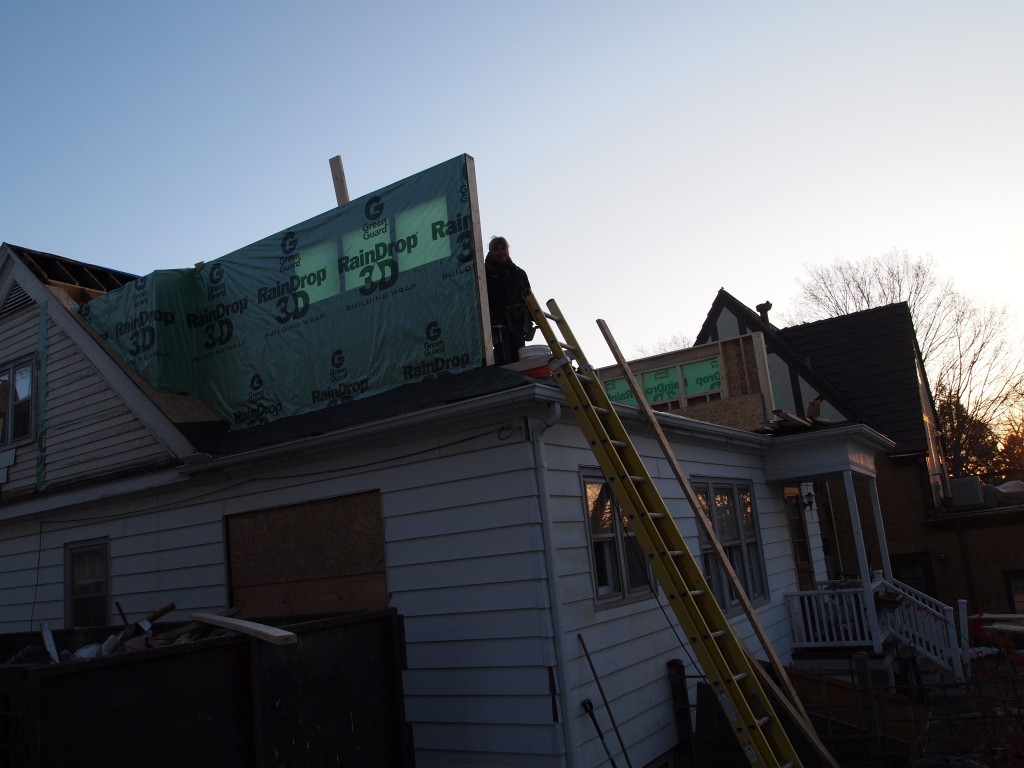
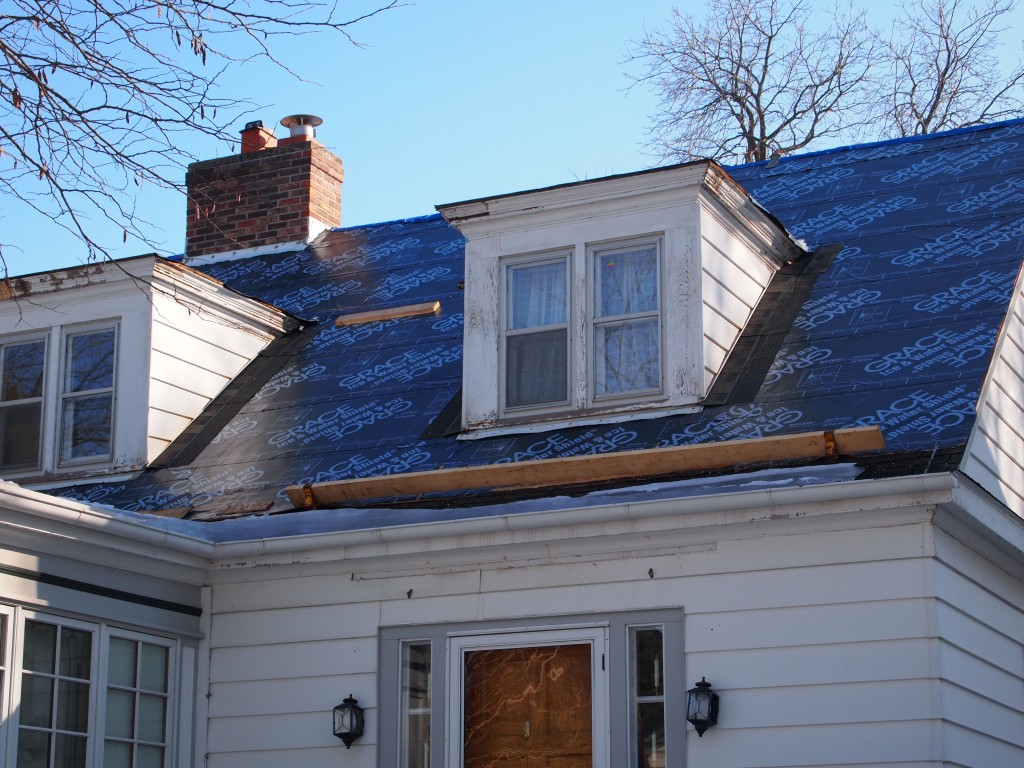
Friday afternoon, the house is wrapped. Note the new porch roof.
Quite a week.
March 23rd, 2014 § § permalink
No big surprises this week, but we did have a couple of discoveries and a great deal of progress. I’ll share the discoveries after talking about the progress. Three major accomplishments occurred this week.
First, the roof over the back of the house was completely removed. A team of Amish did the work. Rick has worked with them before and cannot say enough about their diligence and experience. In the winter they wear knit caps, but when the weather is warm, they wear straw hats. We have not had warm weather. When I invited them to eat their lunch at my dining table because it was so cold outside and in the construction areas, I was surprised when one of them asked to use my microwave. They can use electricity if they don’t own the appliance or tool. They hire a driver to get to job sites and borrow her cell phone to communicate. This week after removing the roof and some walls they began to build the upstairs subfloor. I don’t have pictures that would show the results because Rick laid a temporary floor over the stairway opening, so they had a platform to work from until the subfloor was in. You can see what the stairway looks like in the photos below taken with flash.
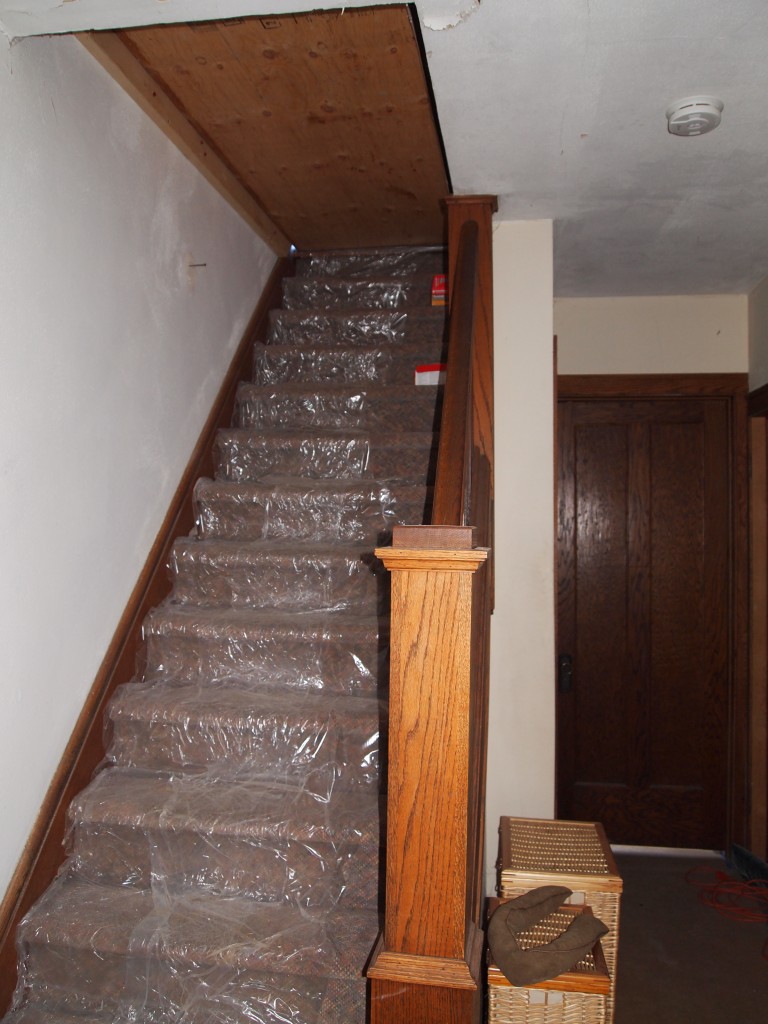
Stairway to the second floor blocked to avoid a big open hole that the crew might accidentally fall into. It also blocks the cold air a little bit from the uninsulated new space. The plastic is to protect the carpet.
The Amish team only works outside. Next week they will help with placing the trusses, building the outside walls, and adding the roof. Then I will get some great photos, although they won’t be in the photos at their request.
Another worker this week is a Jehovah’s Witness. I don’t believe they object to being in photos, but I will ask. We are an ecumenical group.
The second major effort this week was to install supports for the major beams that are part of the new structure. All of these supports are embedded in the walls with the exception of two in the basement. The two in the basement required footings 24” by 24” by 12” deep and the holes had to be inspected by the city before the concrete could be poured. The basement floor was poured about 1924 so I’m sure it is stronger than the new footing even though the floor is only 4” thick. Concrete nears its maximum strength in about 28 days, though it continues to strengthen for decades. Blow are images of the footings and a temporary post in the basement.
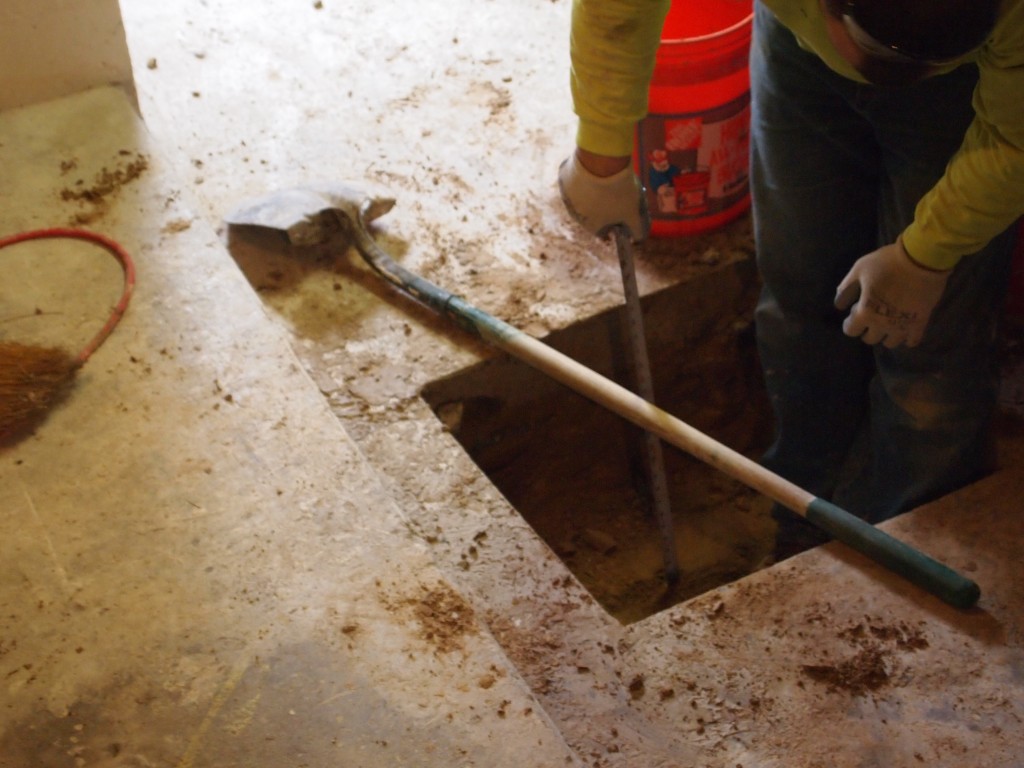
Measuring the footing depth
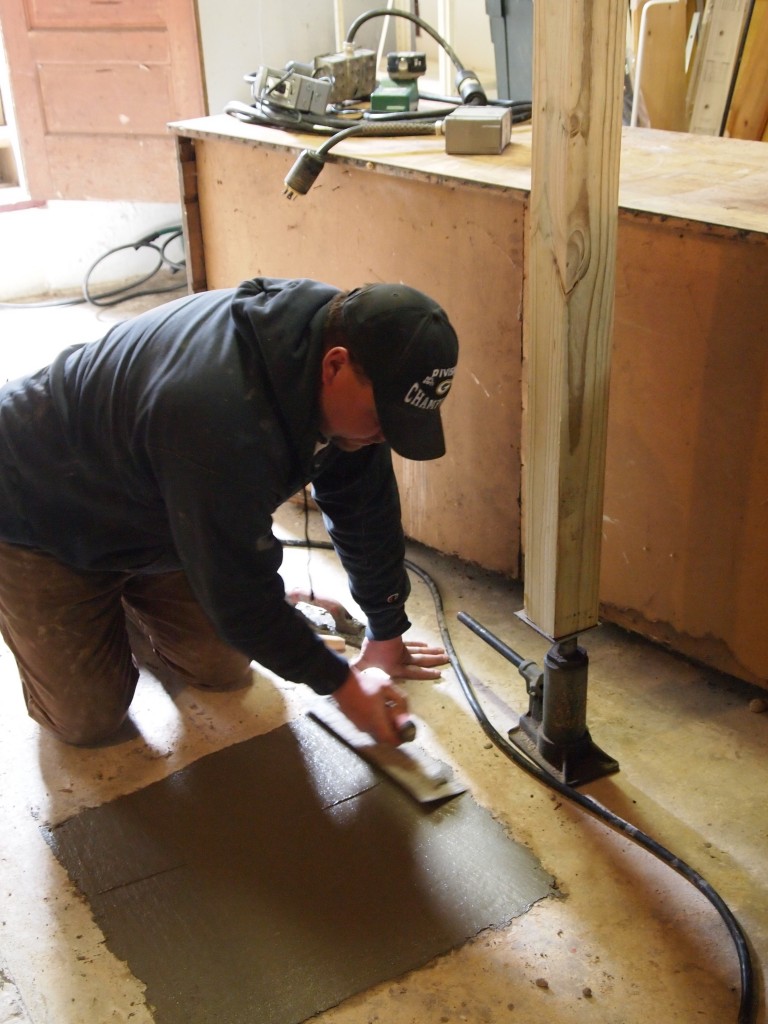
Finishing the footing
The supports in the walls require a more careful installation because they are threaded in and have to avoid wiring and plumbing. The most delicate job is to install the support for the main beam on the driveway side. Most of the supports can be installed from the inside, but the support for this beam has to be installed from the outside because the inside walls are the tiled walls of the upstairs and downstairs showers.

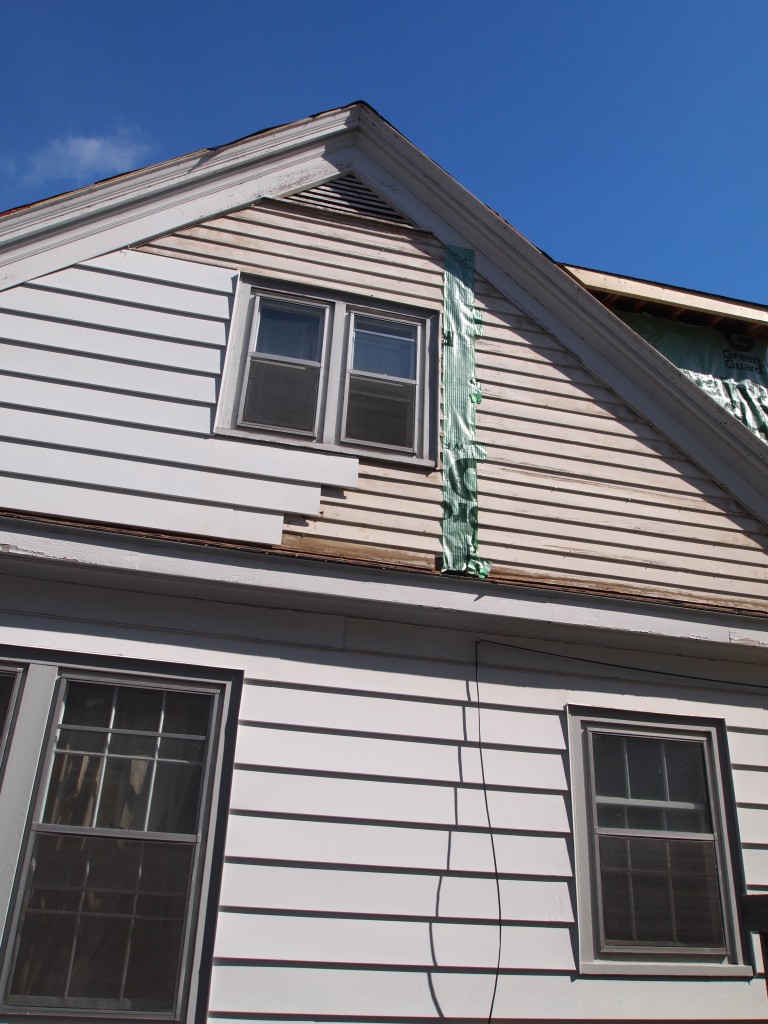
One of the end supports for the main beam is behind the green house wrap. The support had to be installed from the outside of the house because the interior side was the tiled shower of the upstairs bathroom. The lower portion of the support will be installed in the same way because the tiled shower of the downstairs bath is on the other side. Note the original clapboard underneath the aluminum siding.
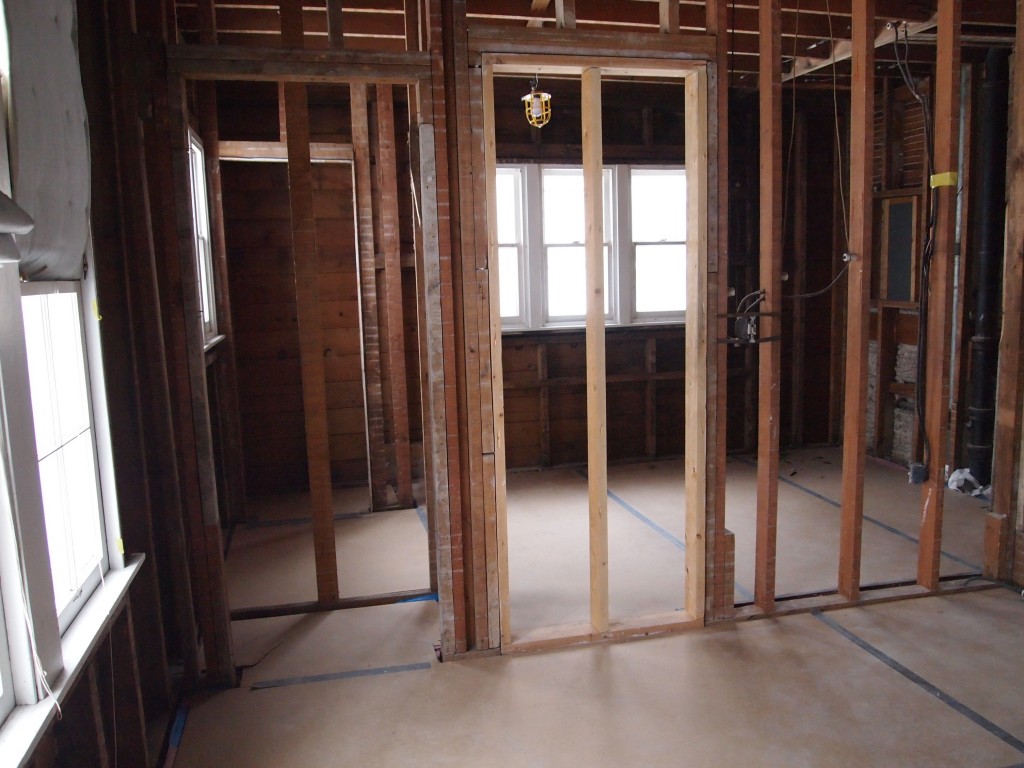
The third major achievement this week was the fitting of the minor beams and the temporary fitting of the main beam. Below are the images of two of the minor beams in place. I will be able to show you the main beam next week after I have access to the second floor.
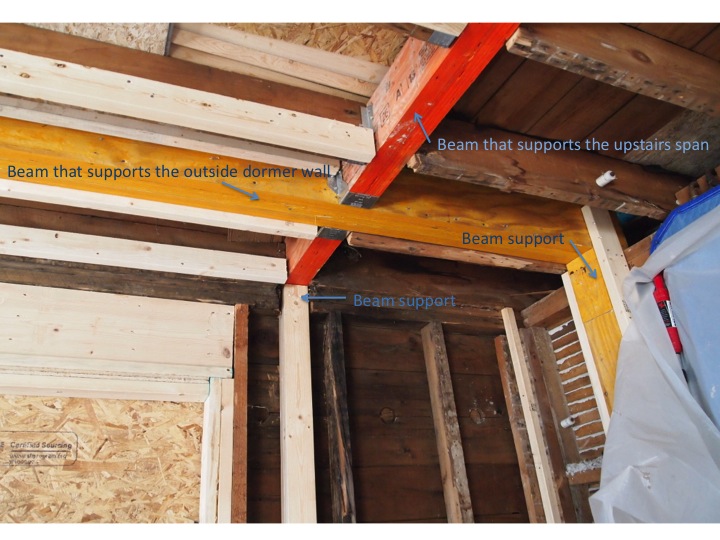
Beams and supports in the ceiling of the new kitchen.
We had two quaint discoveries this week. Greg, the carpenter, found the remains of a checkbook that must have belonged to Clark Hull. Greg found it above the ceiling in Bedroom 3 as he was working on the installation of a beam in the above photo. Unfortunately, the entries are somewhat cryptic and there are no dates for each entry, though the printed date line is 192__. The first check was for a mattress from Bauer Bros. The mortgage payment was $200. I assume that is one month’s payment and is a lot for 1925.

Hull’s checkbook found in the ceiling of the new kitchen. He evidently belonged to the University Club. Once exclusively for UW faculty, the University Club in now open to the public.
The second discovery was that squirrels had hidden walnuts in the plumbing vent for the kitchen sink. They evidently used it for many years since the vent was full to the top, about 10 ft. Of course, the squirrels could not retrieve the nuts, so they just accumulated for 80+ years.
March 10th, 2014 § § permalink
It is after 5:00 PM on Monday and I failed to post on the weekend or even earlier today as I had hoped. My excuse is that things are moving along and I had yet to finish emptying the small attic space and the upstairs hallway until Sunday evening. Work on the second floor began this morning. Now, with the exception of an area in the basement that will have to be cleared for the plumber in about a month, every working space is cleared. The two upstairs bedrooms are packed and I’m not sure I’ll be able to find stuff when this is over.
Back in November I had cleared a space in the garage and and opened up a large area in the basement for construction materials and some workspace. The garage is nearly full and the basement area is rearranged so that footings can be poured for the columns that will support the added weight of the upstairs addition. In addition a beam that should have been there originally will go in. I’ll take pictures tomorrow when they frame and pour the concrete footings and hope that next weekend I will have a post ready to go.
Meanwhile, this past week the shingles were removed from the roof and the back of the house was covered with tarp. The front roof was covered with Grace Ice and Water shield. Monday was a perfect day for the job, but it snowed overnight so Tuesday was a messy day. The roofers needed an extra half-day on Wednesday to finish the Grace. Below is the what the flat roof in the front of the house looked like on Tuesday evening, and the next picture is what it looked like when it was finished. The shingles will go on both front and back after the rear structure is built. The Grace will prevent any leaking until then. Snow/rain is predicted for tomorrow—we’ll see.

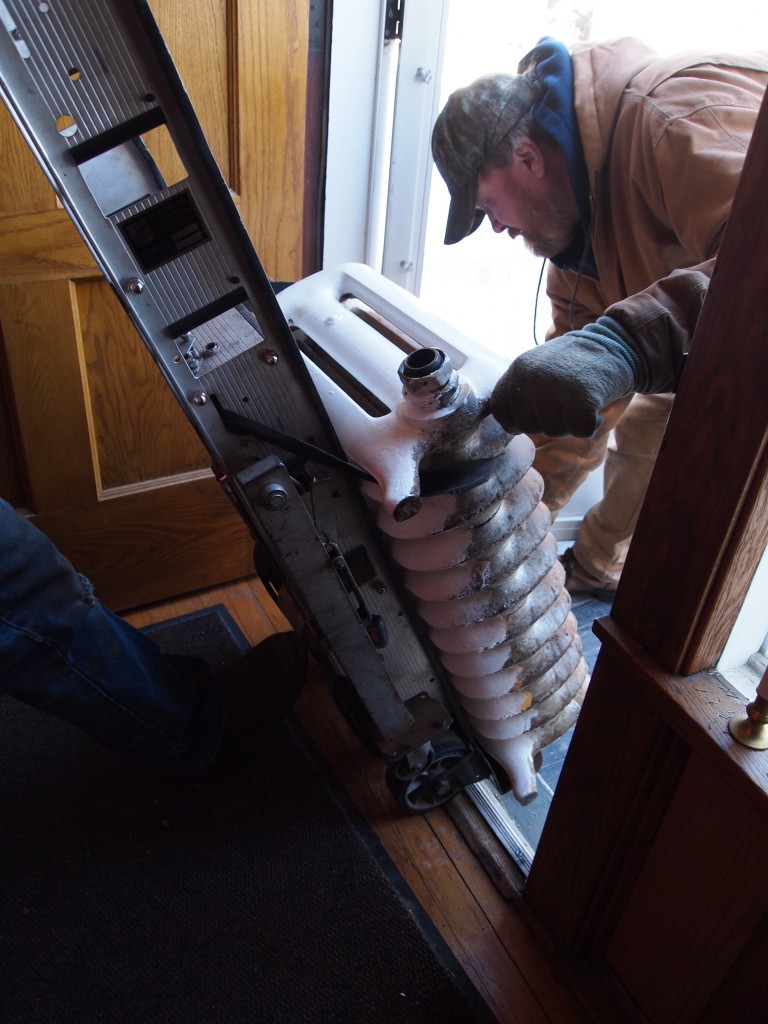
On Thursday a skid steer, also known as a bobcat, maneuvered into the back yard to drill a hole so the footing could be poured for the column that supports the roof overhang on the East side of the house. The first photo below shows how narrow the space was for the driver to navigate. The second is the plywood cover over the hole. I wasn’t quick enough with my camera to get the open hole.
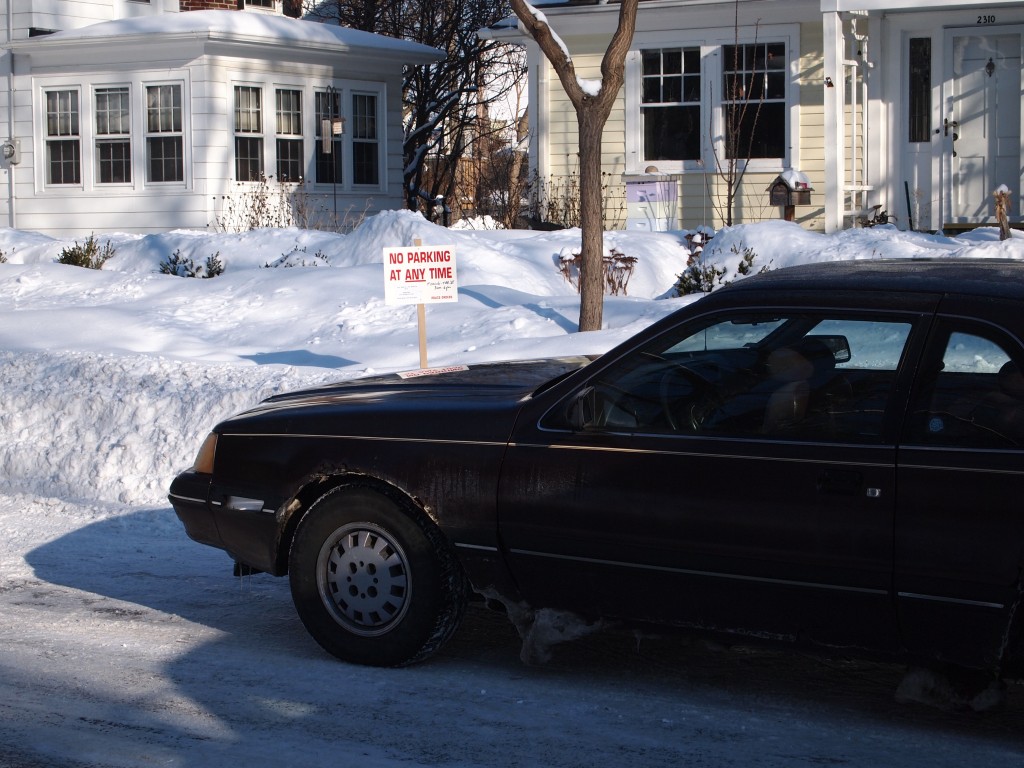
On Wednesday evening Rick, the contractor, posted no parking signs across the street for the working crew to have a place to park and for large delivery trucks to have space to back into my driveway. My house is only one block from the high school and students park in the neighborhood because there is no parking for students on the campus. Also because there is no parking on my side of the street, the signs had to have the tacit approval of my neighbor across the street. This is a goofy requirement.
As you may have guessed this is what we saw on Thursday morning. We didn’t have to call Parking Enforcement to have the car towed. Another student knew who the driver was and ran to the school to get her.

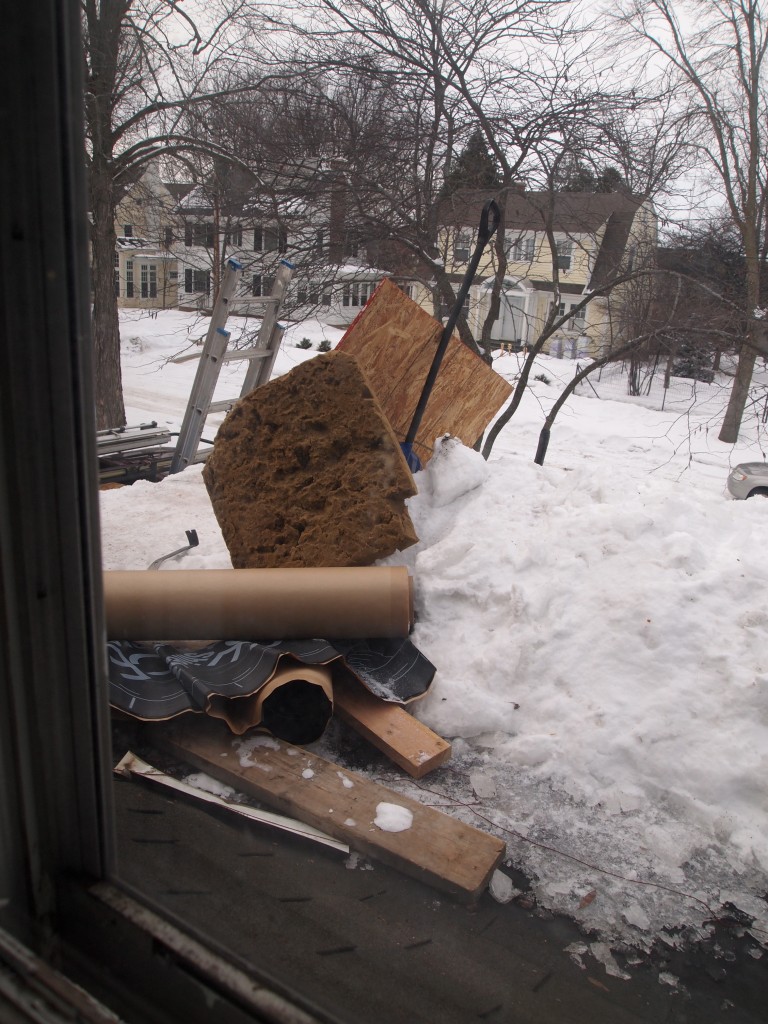
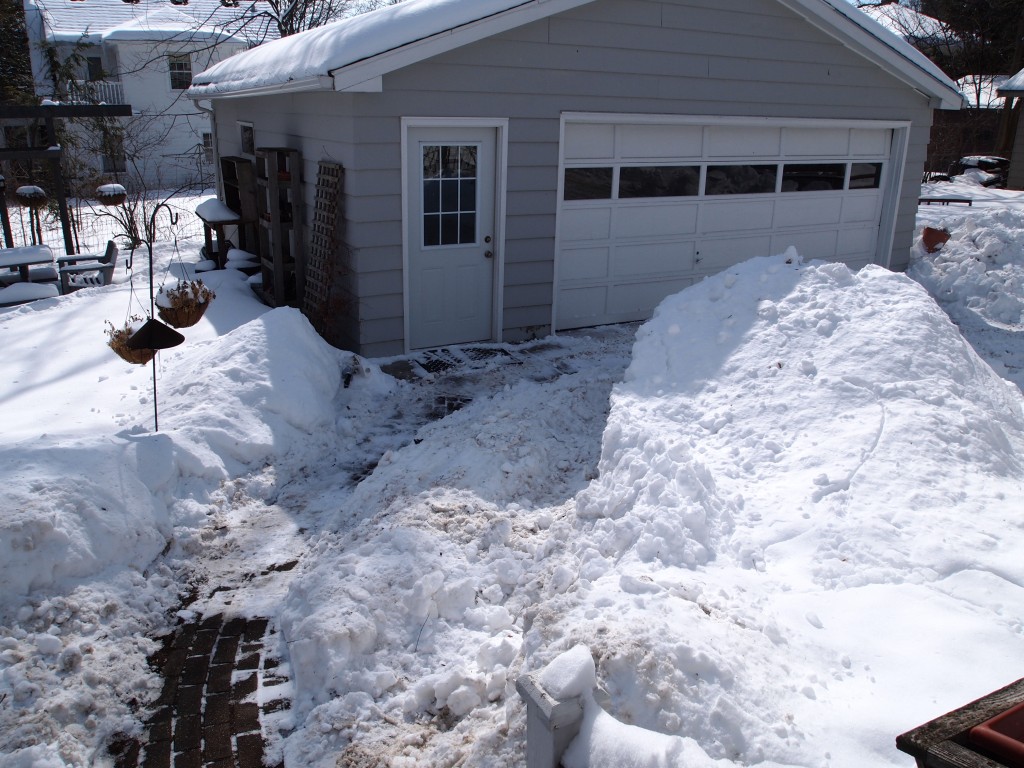
I’ll finish up with photos of the places where the icicles form. These are really small compared to what happens when we have a lot of snow on the roof. These icicles formed when we had only 2 inches of snow on the tarp.
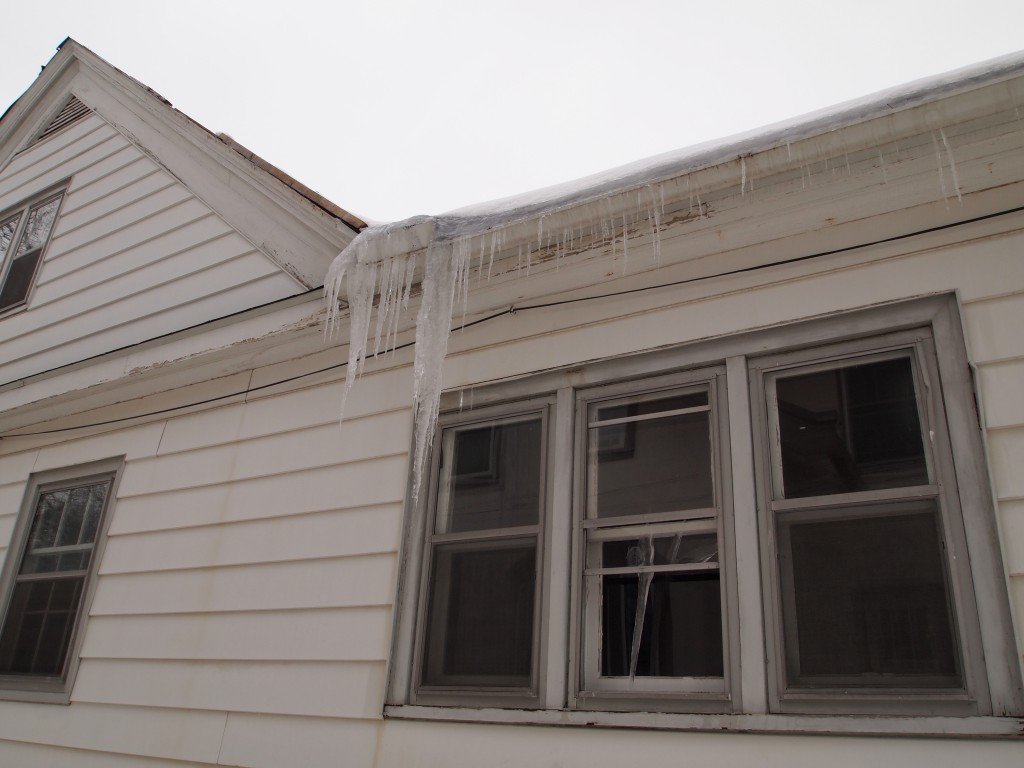
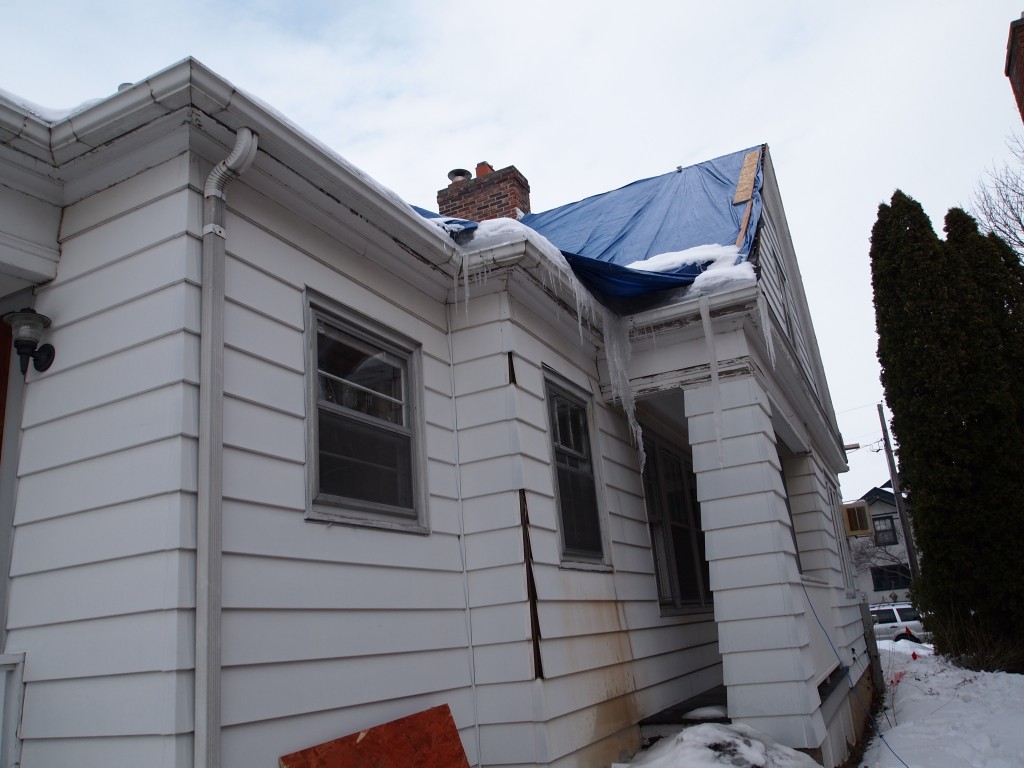
Note the stained siding and the missing corner guards from previous icicle damage.
I hope I caught all the typos, punctuation mistakes, and grammatical errors as I hurried to get this posted. Next week will show some dramatic changes.
March 2nd, 2014 § § permalink
The work this week was mostly prep for what is to come. We had a few surprises. First, let’s catch up with some preliminaries that took place last fall. The asbestos was removed from the heating pipes in October. Then, any surfaces that were to be removed or broken into had to be tested for lead paint. Only one wall, in Bedroom 2, showed positive for lead. I was surprised since the house was built in 1925. The fellow who did the testing said that it wasn’t unusual because in the ‘20s and ‘30s the rooms were often papered not painted. The wood trim pieces and doors did have lead paint. Now on to last week’s activities.
Monday the heating team removed the radiators from Bedrooms 2 and 3 and from the plastered ceiling in the basement. Then Mike the carpenter removed the wood trim from bedrooms 2 and 3 as you can see in the photo below. After he removed the trim, Mike laid down rosin paper which he then covered with masonite. The floor protection continued from the bedrooms all the way to the front door. We will reuse some of the baseboard trim because it has an unusual profile. It’s in the garage for now.
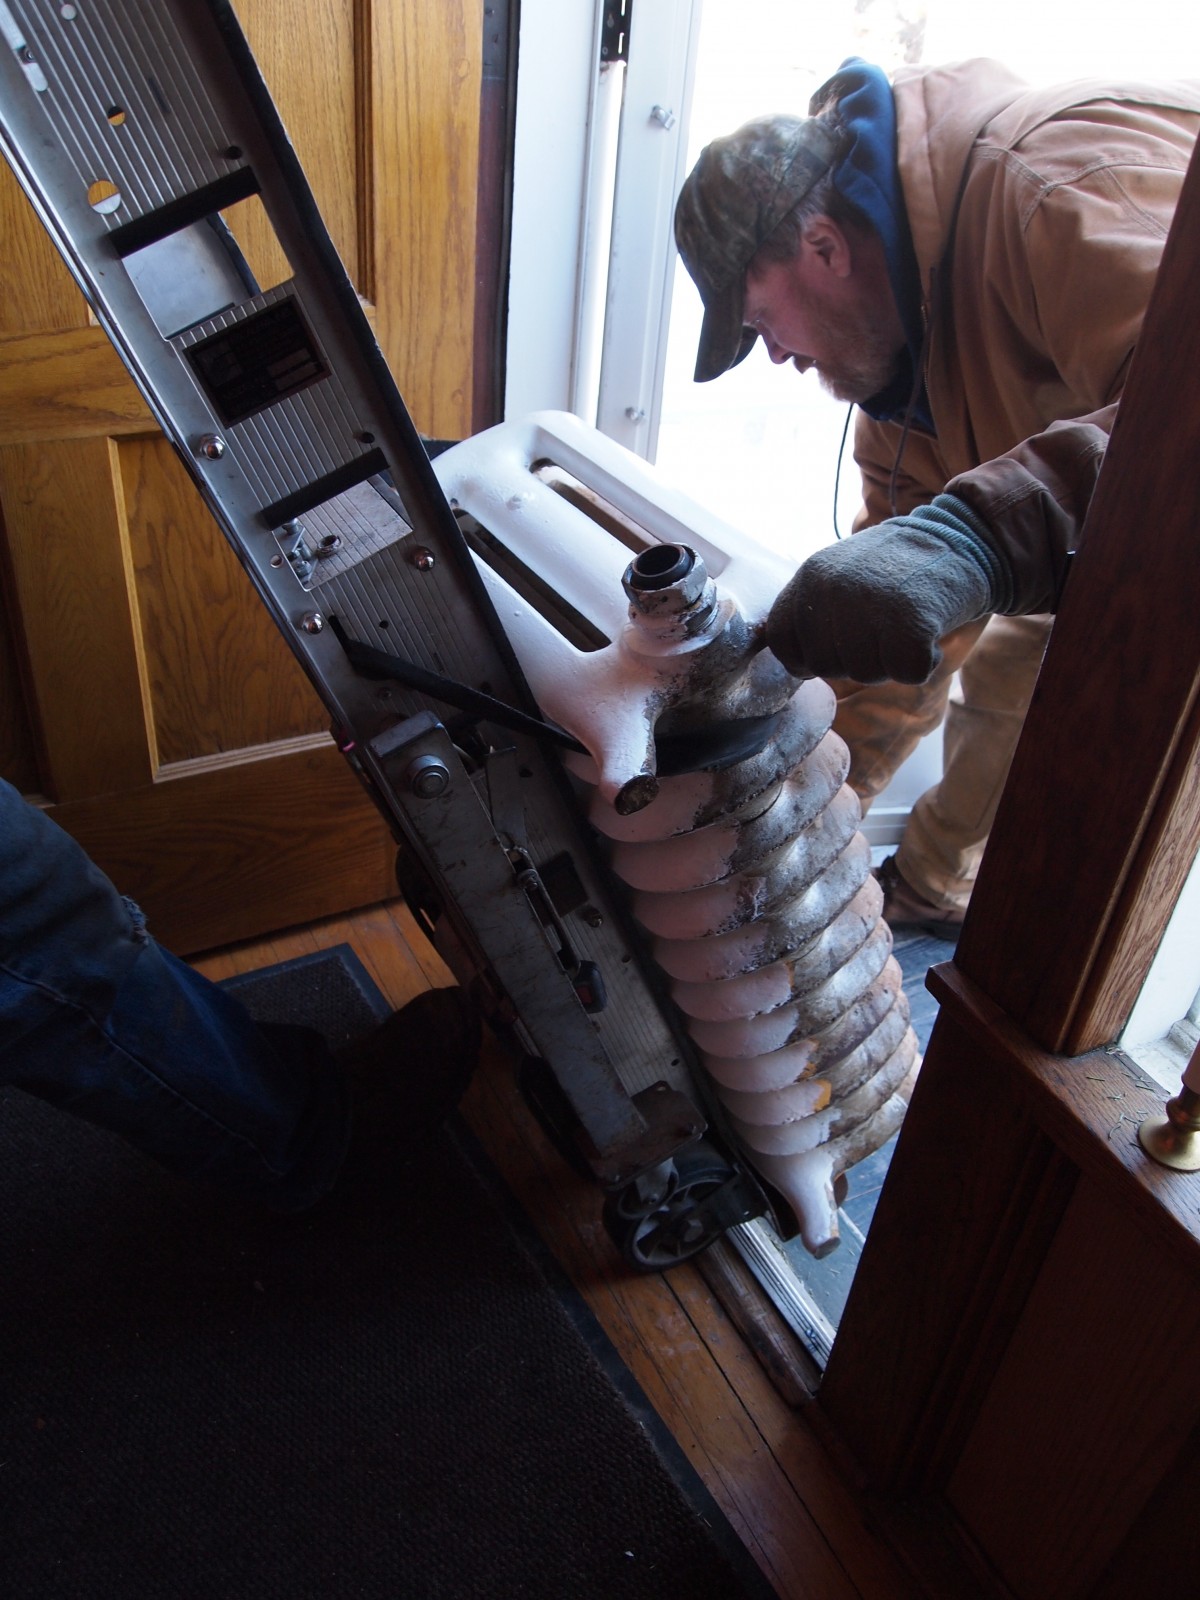
Radiator on a dolly with an extra set of wheels so it can go up and down stairs!
Baseboards and trim from door and windows removed.
Tuesday the electrician disabled outlets in the rooms and replaced the light fixtures with safety lights. Mike finished removing the trim.
I went to the City Building Department and picked up the permit. Our plans were approved in less that a week, primarily due to the very thorough work of Chris and Brian at Marling Lumber. Rick, Chris, and I had been working on these plans since October.
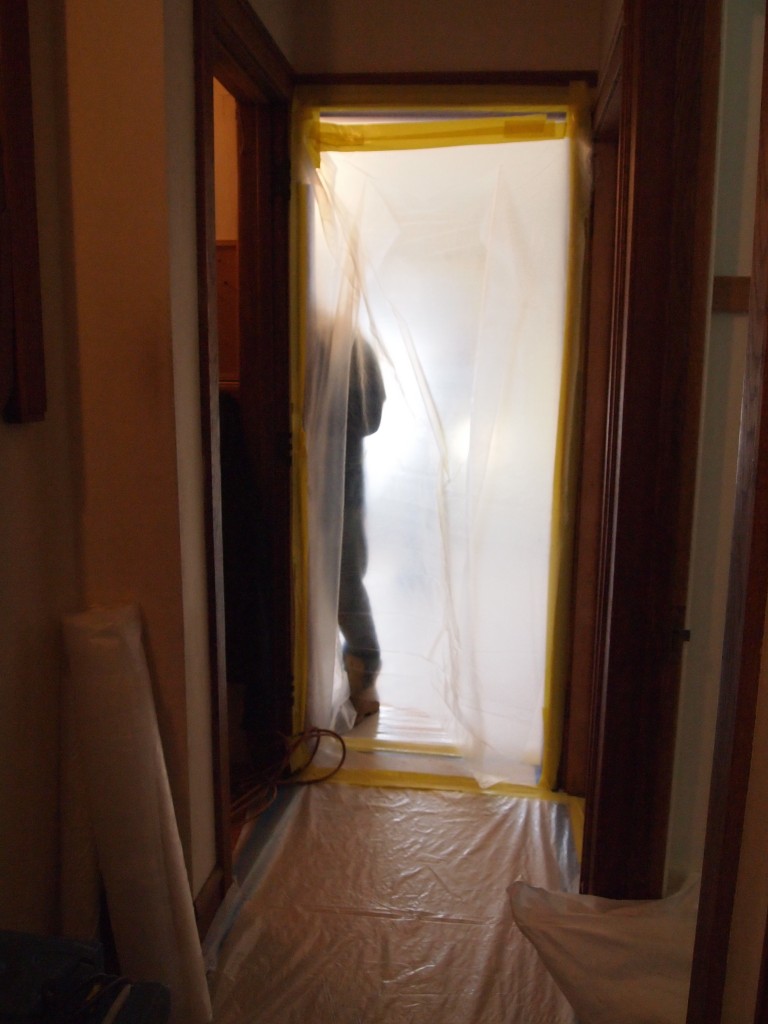
Wednesday the plaster removal crew came in and covered the bedroom doorways with plastic sheeting. They made a plastic tunnel from the bedrooms to the front door to keep the plaster dust from getting in the rest of the house. Plaster removal gives access to electrical and plumbing lines from the basement and makes it easier for everyone to work.
Plastic covers the doors keep the plaster confined. Plastic even covers the masonite on the floor.
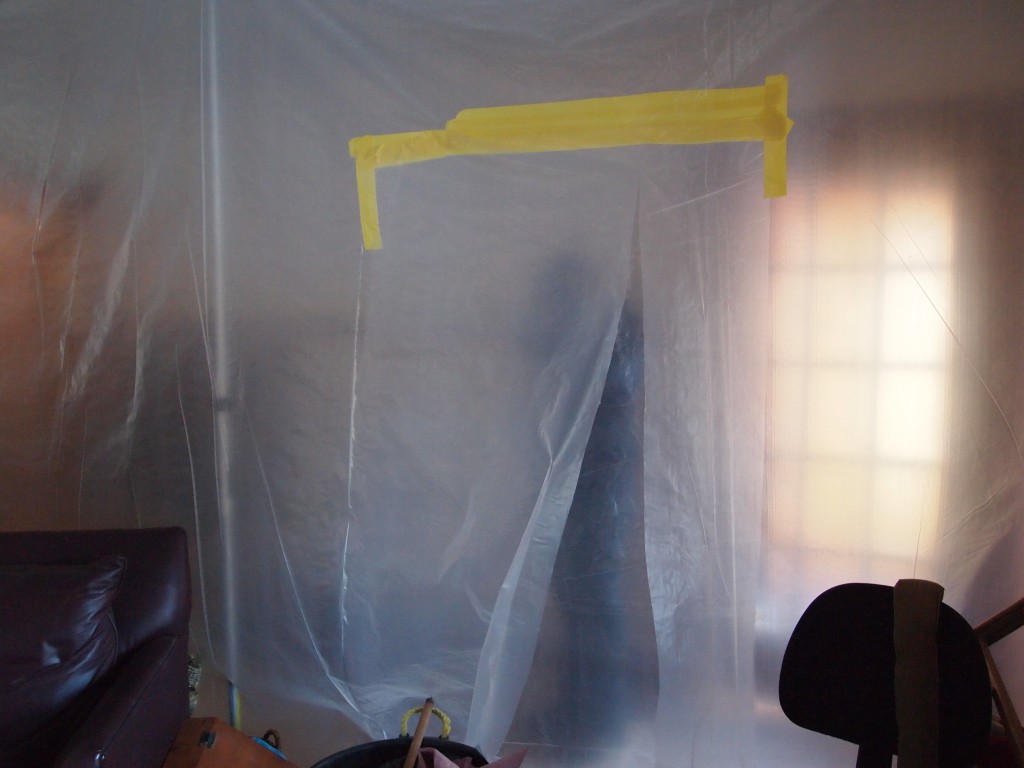
The plastic tunnel.
The plaster removal crew thought they could finish the bedrooms and the basement ceiling in one day. However, they got a big surprise. They found two types of insulation in the bedroom walls. One was a tight thick batting that appeared to contain straw. The other was the fluffy cotton-like stuff that is blown in through holes in the siding. We think it was done when the aluminum siding was installed in the ‘50s or ‘60s. We could see the holes in the sheathing. The straw-like stuffing was nailed into place on the inside of the studs and the cotton-like stuffing had settled and compacted to the bottom of the studs. The crew of four worked nearly 12 hours that day on the bedrooms alone. No one thought the walls had insulation. Surprise!
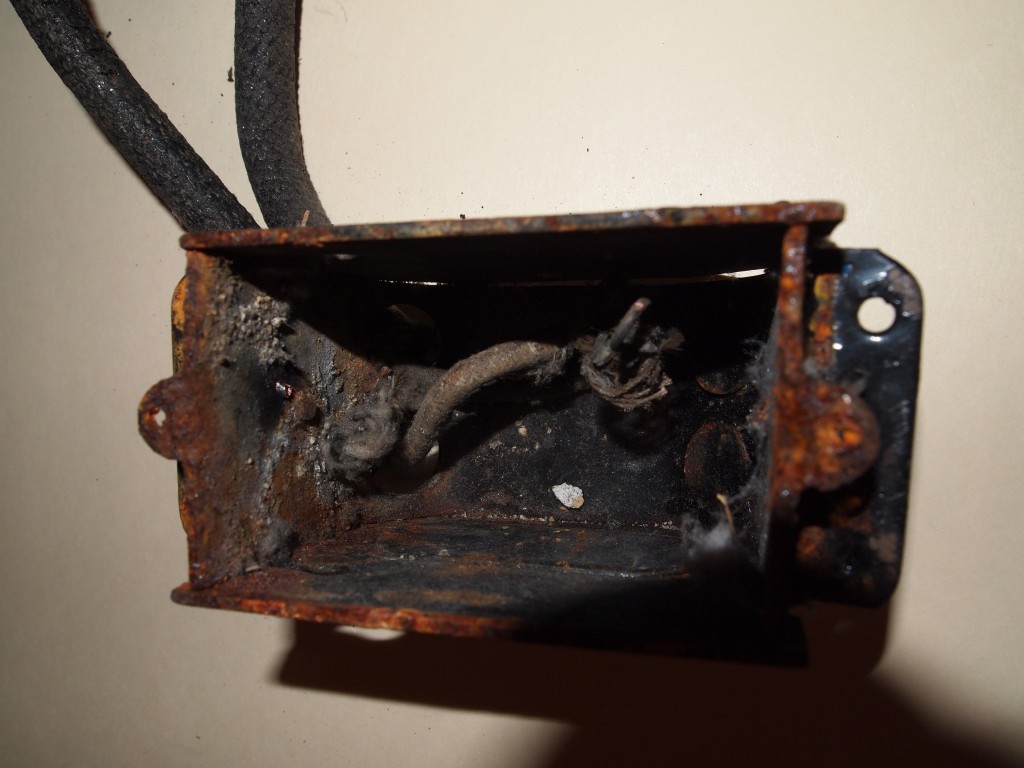
While they were packing up their gear Wednesday evening, I stepped into the room and turned on the lights to better see the result. But the lights didn’t come on. I checked the bathroom light which is on the same circuit and it didn’t come on either. The breaker had tripped and when I flipped it on, it tripped again. There was a short somewhere.
Thursday morning Rick called the electricians who came right away and found the short. It was in an electrical box that had been under the plaster! It had obviously been ok until the removal crew jostled it enough to make the unprotected leads touch each other or the box and cause a short. A surprise that could have been serious. It’s not clear when that outlet had been plastered over. Not a surprise is the knob and tube wiring. That will be removed next week.

Old electrical box buried beneath the plaster in Bedroom 3
By noon the crew removed the ceiling in the basement. And then I spent two and a half hours on the phone trying to find out why AT&T didn’t show up as scheduled to move the phone/internet line.
Friday, Rick and I reviewed the window order.
Next week will be very busy too. Let’s hope there are no surprises.
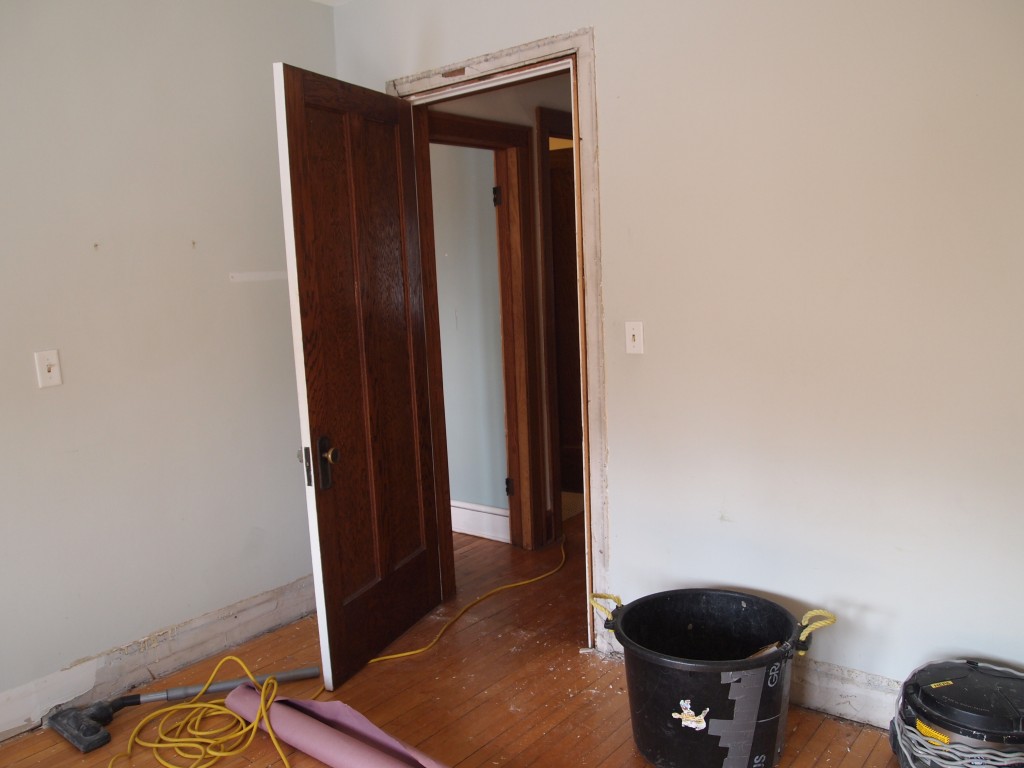
Here are a couple of “before and after” shots from approximately the same places.
Before plaster is removed
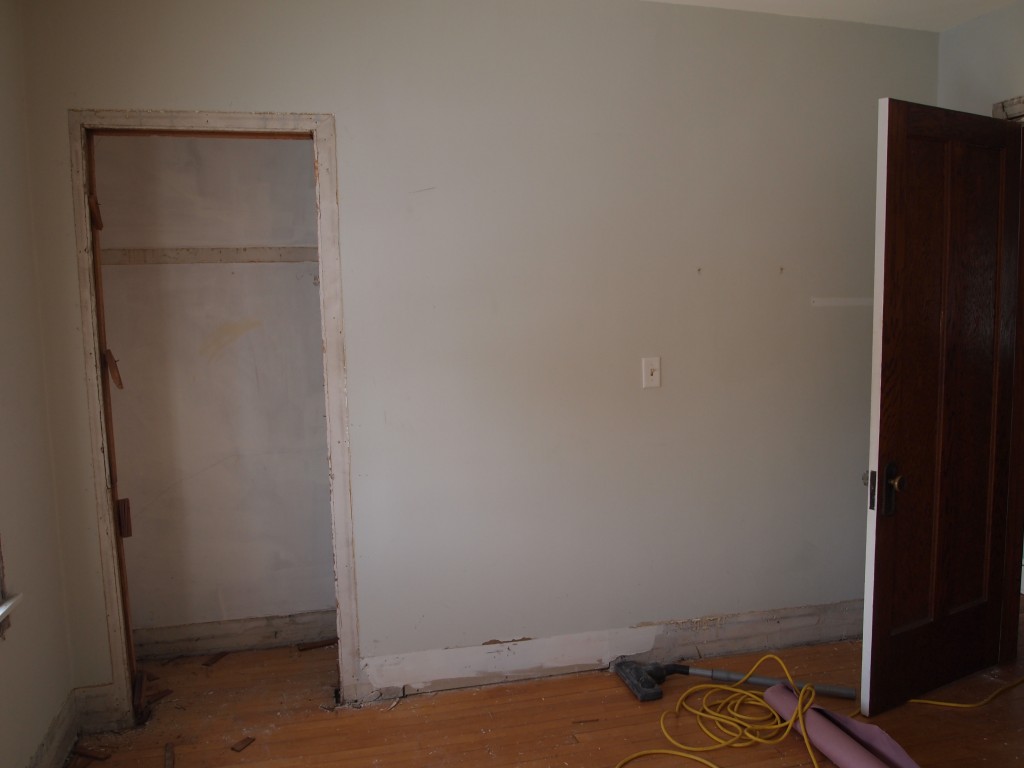
After plaster is removed. Looking toward the new kitchen space. That wall is coming down.
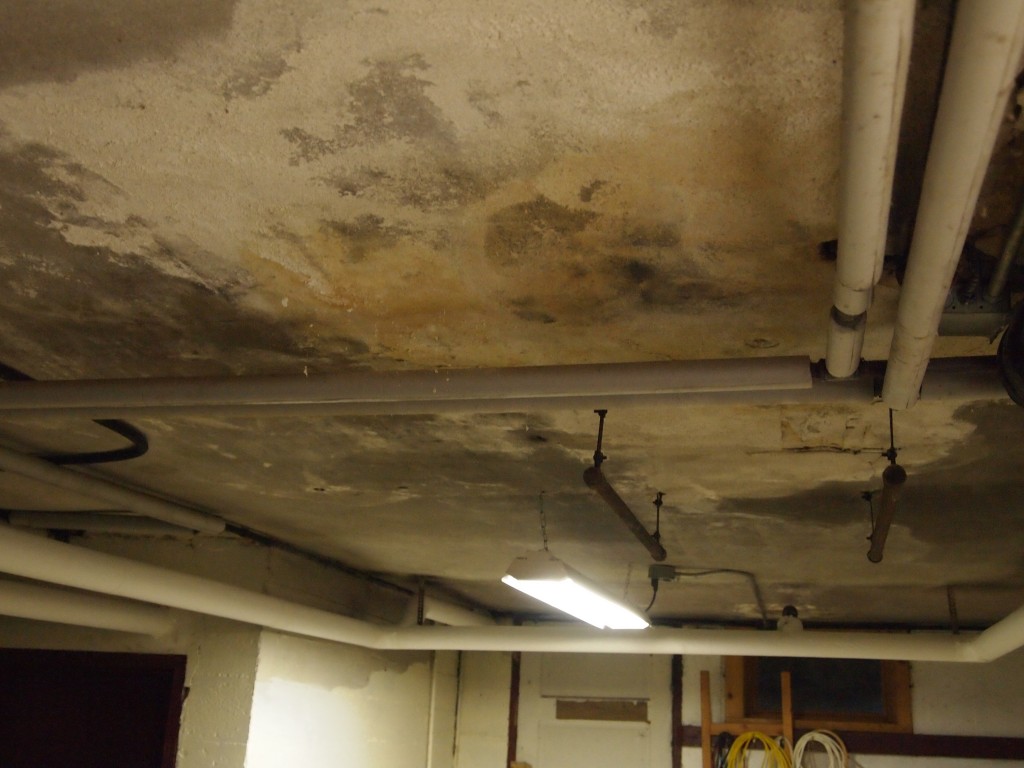
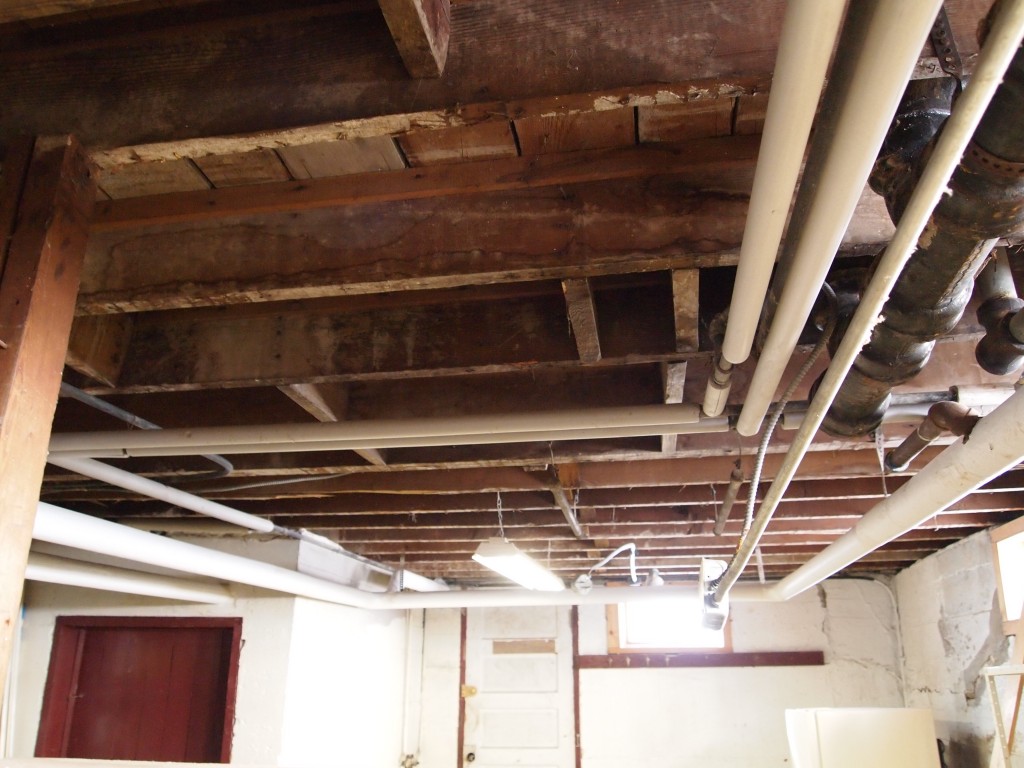
Plastered basement ceiling before. This space used to be a garage.

Basement ceiling after.